
CRM Set up (CRM only)
(this takes about 2 - 5 minutes)
1. Opportunity stages
(this also covers estimates and quotes - click on your name at the top right and select Admin system, then Opportunity stages)
1.1 Click on Add an opportunity stage
1.2 Give it a name
1.3 Add the percentage (this is the likelihood of getting the job or getting an order)
examples:
Appointment arranged 10%
Estimate / quote sent 50%
Success (Won) 100% (100% will mark as completed and hide the opportunity)
Lost 0% (0% will hide the opportunity)
1.4 Set the order and select a colour
1.5 Click Add stage

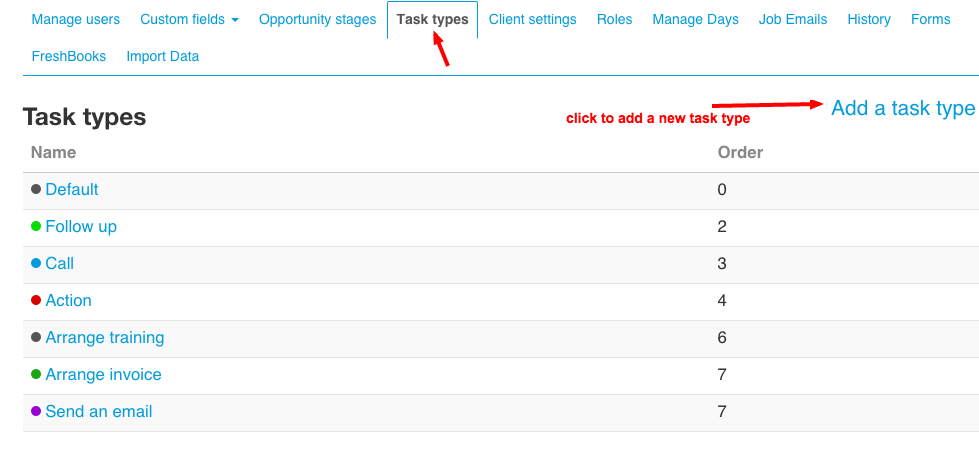
2. Task types
(click on your name at the top right and select Admin system, then Task types)
2.1 These are task that you can assign to someone or for you. Click on add a task type
2.2 Give it a name examples: Send an email / Call / Follow up / Do
2.3 Choose a colour
2.4 Save task type
3. Roles
(click on your name at the top right and select Admin system, then Roles)
3.1 These are required to add new users. They decide which menus everyone will see. It's quite simple: just click Add a user role
3.2 Give it a name: example: Engineer Technician or Sales
3.3 Then select from the menu. The menu depends on what you want this user to be able to do:
- Job Administrator: You will always require at least one user with the Job Administrator role. This person creates and manages the jobs. You can also assign jobs to these users.
- Job Worker: You can assign jobs to these users.
- Sales only: This user can access contacts and companies (They do not have access to job bookings)
- Sales / events / emails: This user is the same as sales only plus they can access events and emails (They do not have access to job bookings)
- Sales with restricted access: These users can only see contacts who are assigned to them. They also have restricted access to see only tasks assigned to them / Opportunities assigned to them. They also see Documents.
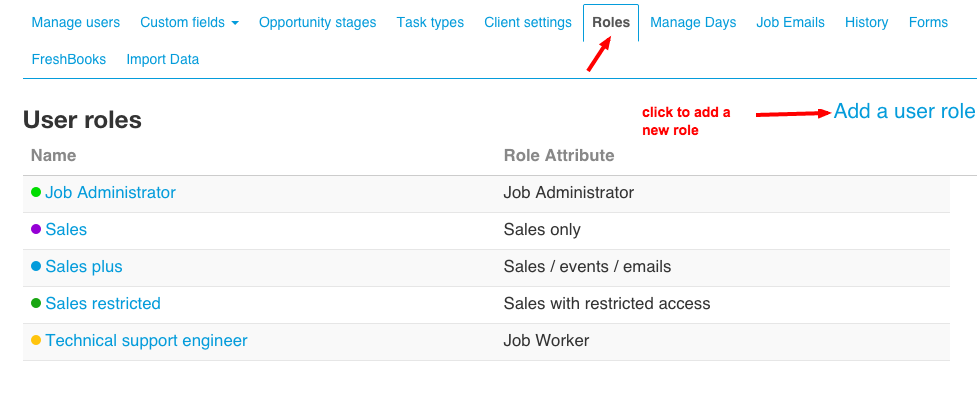
Add a role

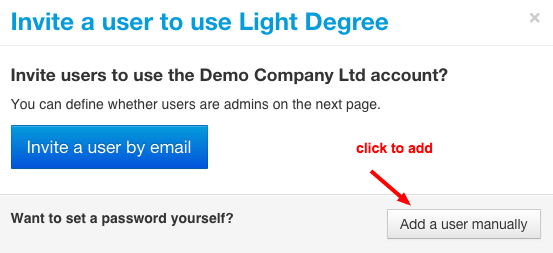
4. Manage users
(click on your name at the top right and select Admin system, then Roles)
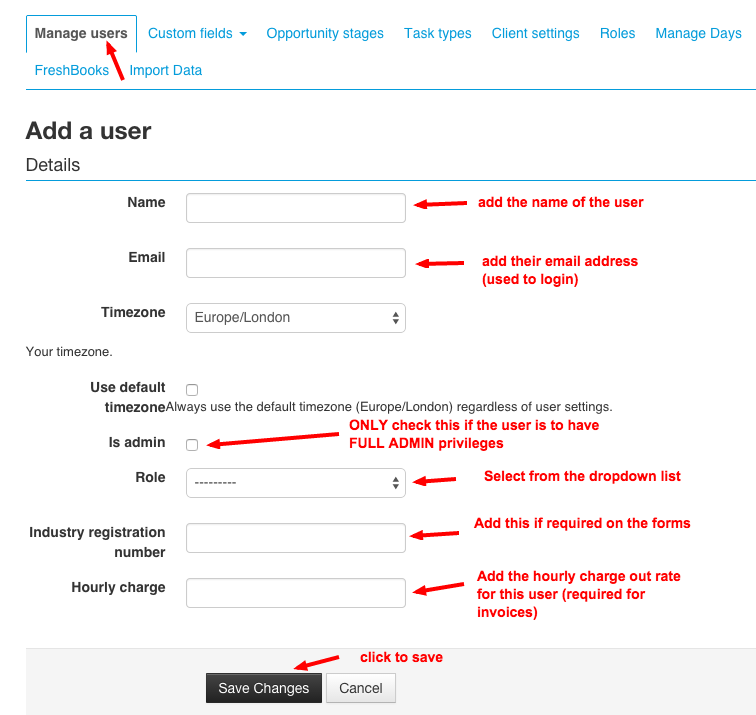
4.1 Click on Add a user then Add a user manually
4.2 Add their name / email address
4.3 Select their role (see roles above)
4.4 Add their hourly charge out rate (if using job management)
4.5 Click Save changes (add some more users)
Click on add a user
Now add their details
Now set a temporary password so they can login (click on change password)
5. Contacts
(click on contacts in the top menu)
Now it's time to add some contacts and enjoy using the CRM.
WELL DONE
YOU HAVE DONE A GREAT JOB
Comments