
Printer Set up
The LightDegree android app is designed to connect to Star printers to print the purchase invoice within collections.
See the initial settings required for the printer and for the app (below).
Once set up all you have to do is to pair the printer with the tablet / phone using bluetooth and then each time you select the Print button on the purchase invoice receipt it will print.
Pairing the printer
First pair the printer to the tablet or phone use the PIN 1234 (This code can be updated for security) Typically go to your bluetooth settings, search for the device, click on it to pair and type in the PIN code.
App setup and print:
To print, click on the print button.
Then select the printer in the app setting and then choose Bluetooth (in Select interface), then select the printer Star Micronics, now scroll down and select SM-T3001/T300 STARPRNT and confirm.
(NOTE: Do not select the first SM-T300i/T300 as this will not work - scroll down the list further to find the SM-T3001/T300 STARPRNT).
Now just click the printer icon at the top right of the screen. You can select this multiple times if you need to print more than one copy.
Loading the paper
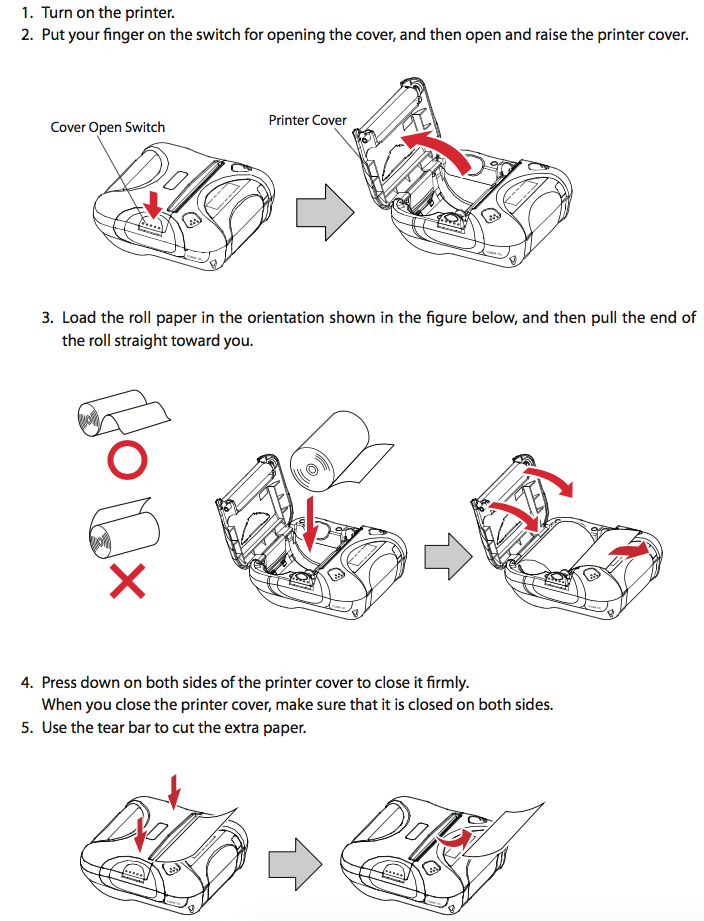
Initial set up for the Star SM-T300i 3 inch mobile printer.
Steps:
1. Printer setup: With the power off hold the FEED button (keep holding until the printer starts printing) now hold the power button as well (left hand side next to the screen).
This will print the current settings.
The settings required are: (check the print out)
PORT = Bluetooth(Auto)
EMULATION = StarPRNT
AUTO CONNECTION = OFF
If any of these are different follow these steps.
To change the PORT to Bluetooth(Auto)
With power on, hold both the power and feed buttons for approx. 3 seconds. The screen will begin to flash. Now click the feed button to scroll through to Bluetooth-Auto. If you see Bluetooth-Mac press the power button once to change to Bluetooth-Auto. Now hold the power button and the feed button together and a print out will confirm your settings.
To change the emulation setting
This is only required where the emulation mode is currently EMU = ESC/POS
With the power on open the cover (paper cover) now hold the power and feed buttons simultaneously until the error light flashes x 5 times (setup will appear on the screen) then release the buttons. Now close the printer cover and the cover and the printer will print out the updated mode EMU = StarPRNT.
To change the auto connection setting
With the power on hold the power and feed buttons simultaneously until the error light flashes x 5 times (setup will appear on the screen) then release the buttons. Now click the power button once then scroll using the feed button until you see AUTO CONN ON (or OFF). Click the power button to switch from ON to OFF. When you have changed to AUTO CONN OFF hold the power and feed buttons together for several seconds and then release. The printer will print out the current settings to check.
Comments